Weather Stationary

Easy Home Weather Station Troubleshooting Tips

Easy Home Weather Station Troubleshooting Tips

I cannot get outdoor readings on my weather station from the outdoor sensors.  What could be the issue, and how do I deal with it?  Do I need to call for a weather station troubleshooting technician?

My temperature readings are higher than expected; what could be the problem?  My rain gauge shows readings higher than expected; how can I test to know if it is accurate?  If you have problems like these, read on for our weather station troubleshooting tips.

What Is Weather Station Troubleshooting

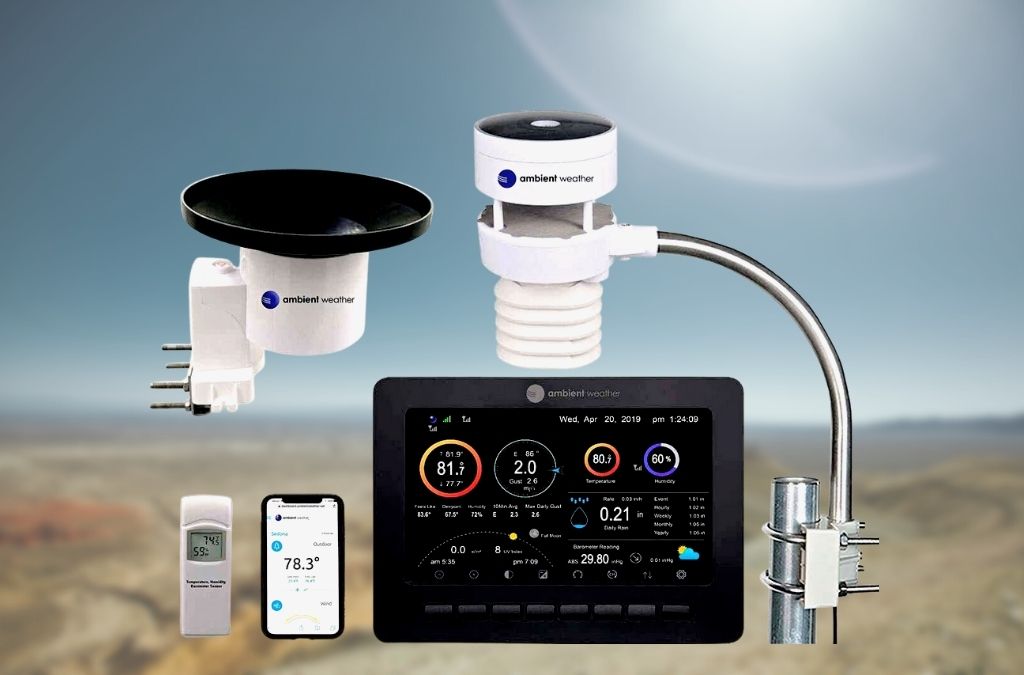
These questions and others are not uncommon when you are using a weather station at home.  Weather stations are complex pieces of equipment that consist of various parts, including sensors, consoles and connections to other devices.  If there is a malfunction with any of these elements, you are sure to have problems, including inaccurate readings. 

You can also have issues with smart weather stations – those that connect to weather apps or weather networks.  These include not finding the Hub or WiFi network, the Hub losing its WiFi connection and sensor devices not reporting data.  Malfunctioning weather stations can be frustrating, especially if you wish to collect data for an extended period for analysis. 

Luckily, you probably won’t require a technician to deal with these issues.  Most of the weather station problems can be dealt with using a few setting adjustments and calibrations. 

Weather station troubleshooting often begins with the instruction manual.  Following the manual during the initial setup can help prevent many issues you may later encounter with your home weather station.

Weather Station Problems And Troubleshooting Them 

1. Troubleshooting Rain Gauge Issues 

Rain Gauge Not Giving Any Readings 

You can experience issues where your rain gauge is not offering any readings at all.  No readings are recorded, which means the historical data is lost and this can affect your analysis. 

Cause: One of the most common causes of your rain gauge not giving any recordings is the presence of spiders, cobwebs, or other debris.  These are often found in the tipping bucket or funnel and prevent water from being collected.  This can also be the case inside the rain gauge itself, where bugs, insects, and other debris can collect and not allow water into the gauge.   

Solution: If you have problems with cobwebs at the tipping spoon/bucket or funnel, simply clean it out.  A great weather station troubleshooting tip is to ensure you clean your weather station sensor array every six months. 

Also, prevent spiders from building cobwebs in your rain gauge by spraying with a bug deterrent.  This also works for debris within the rain gauge itself.  We suggest you check the rain gauge every couple of months and more regularly during autumn when leaves are falling.  Leaves will quickly block the outlet and prevent a rain gauge from getting any readings.

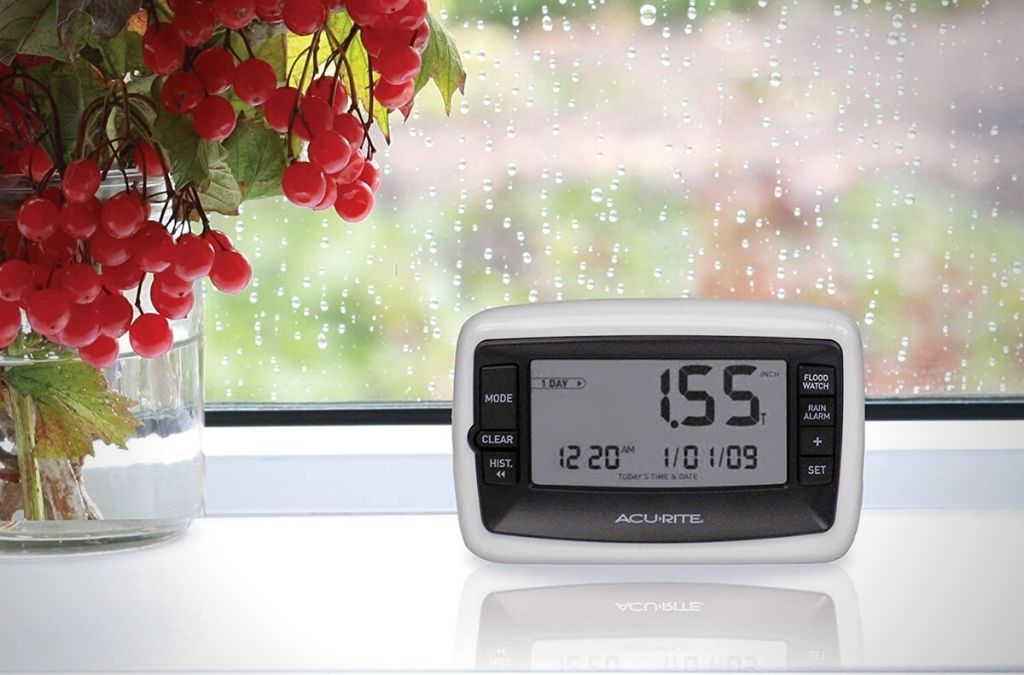
Rain Gauge Giving Higher Readings Than Expected   

You may have an instance where your rain gauge seems to be giving readings that are higher than what you expect.  This issue can be tedious and will require some patience as you investigate what the problem is.

The easiest weather station troubleshooting tip is to test your rain gauge accuracy.  Pour a known amount of water into or through the gauge and compare the reading.  Our experts suggest you do this a few times and take the average.  Your readings need to be within 1-2%

Cause: It can be an issue with calibrations or settings adjustment.

Solution: If the rain gauge readings are high and the weather station offers a calibration screw, you can adjust it to get accurate readings.  

2. Weather Station Troubleshooting Temperature


Temperature Readings Much Higher Than You Expect  

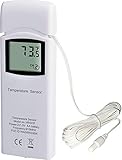
A common issue with temperature readings is that the sensor has not been positioned properly.  Such readings affect your analysis and will affect your data in the long term. 

Cause: The issue is usually the result of incorrect positioning of the temperature sensor during setup.  Temperature sensors need to be placed out of direct sunlight in a lightly shaded position.  

Solution: The temperature sensor should be away from direct sunlight and should be in a shady position. The ideal placement of a temperature sensor is to fix it on a north-facing wall. 

A wireless temperature and humidity sensor can also be placed under a tree, but if the temperature sensor is on the weather station you will need to find a shady place.  It will be best to study the area before you place your weather station. Monitor the area, especially during the day, to ensure you know the areas that remain shaded.  

If you have high-temperature readings from an indoor console, it may be getting direct sunlight through a window.  Also check that it is not close to devices in the house that emit heat, such as computers and TV sets. 

Low Outdoor Temperature Readings  

Cause: Low outdoor temperature readings can be due to calibration settings, or the radiation shield is close to sprinklers. 

Solution: Make sure the temperature sensor is away from any sprinklers.  

Calibrate the thermometer.  Fill a container with ice and then add water.  Stir and let it sit for a few minutes before adding the thermometer sensor for at least 30 seconds.  The temperature should read 32 degrees F or 0 degrees C.  If this is not the case, check the batteries by replacing them and then press reset. 

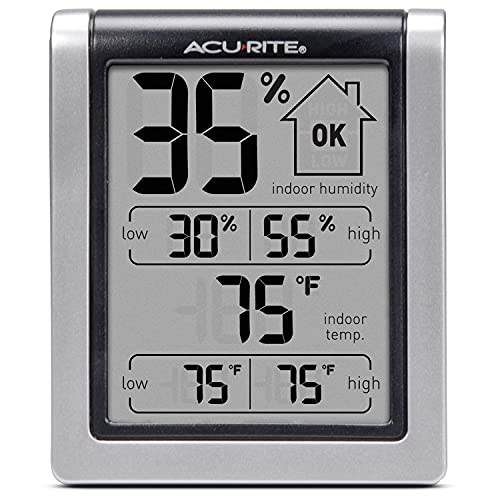
Low Indoor Temperature Reading  

Your console can display low temperatures even when the room is not cold. 

Cause: You can experience low temperatures if the temperature sensor is near an air vent. It could also be that you have placed the temperature sensor near a drafty window. 

Solution: You may have to recalibrate the temperature sensor – see above.  Additionally, you can move the sensor away from the cool air vent or place it where the temperature is stable.

3. Troubleshooting Console Issues 

Console Doesn’t Display Data 

A common troubleshooting issue with a home weather station is the console not displaying any data.  Instead, it may be displaying only dashes. 

Cause: This is usually when the sensor array cannot transmit data to the console.  There may be an obstruction blocking signals from the sensor array to reach the console.  Also, the console may display dashes if the sensory array runs out of power. 

The problem can also happen if you exceed the storage capacity of the console or the device is unable to receive data from the sensory array. 

Solution: Check the sensor array to determine if there is any obstruction blocking the signals.  These can include walls, trees and even buildings.  If you identify an obstruction, you will need to move the sensor array so that there is a clear path between the sensor array and the console. You should also check that the array is powered up.  You may need to replace the batteries, or if you have a corded home weather station, check the power.  

If the sensor unit is powered and there is no obstruction, download the data onto your PC or a USB and clear the console.

A Sluggish Console 

You can also experience issues with your weather station console becoming slow or not offering a clear display. 

Cause: Your console will become slow if the temperature around it drops very low.  This mostly happens if your console is located outside and the components become too cold to function. 

Solution: If your console is becoming sluggish due to very low temperatures, you can consider installing a temperature sensor near the console to help in monitoring the temperatures.  It will be best to use a wireless thermometer to enable you to monitor the temperatures from indoors.  

Consider placing a shelter over the console.  If the low temperature readings persist, you may look to move the console indoors. 

4. Smart Weather Station Troubleshooting 

Smart weather stations are very easy to use and give detailed and accurate weather data.  For instance, you can use the mobile app to monitor weather even when you are not around. An added benefit of smart weather stations is that you can integrate them with other smart devices in the house. 

Integrate your smart weather station with Alexa or Google Assistant to use voice control for temperature changes.  However, these complex devices are not immune to issues so look at these easy weather station troubleshooting ideas. 

The most common include:

WiFi Network Is Not Found   

The smart weather station may be having challenges locating your WiFi network. 

Cause: The issue could be with your network connection. 

Solution: Use the mobile app to refresh the device to see if it will connect to the network.  Check that the WiFi router broadcasts at a 2.4 GHz band network connection.  The Hub uses a 2.4 GHz band network, which offers a more enhanced range than the 5 GHz.  As the Hub is continuously updating, it does not need a fast transfer of data. 

You can also choose to set up the Hub manually if the network connection is not visible. 

Finally, you can deal with the issues by rebooting the router, Hub, and range extenders. 

Hub Doesn’t Connect to the WiFi  

Sometimes you can get an error message on your mobile app stating, “ Hub not connected.”  This is a common error and is often asked when troubleshooting your weather station.

Cause:  Router not connected to the internet, broadcasting on the wrong network, or Bluetooth is not turned on.

Solution: Ensure that you enter the correct password as you set up your smart home weather station. You can refresh the device after re-entering the password. Additionally, you need to ensure your device is broadcasting at 2.4 GHz and not 5 GHz. 

The smart weather station comprises various devices, including the Hub, router and range extenders.  If your device cannot connect to the WiFi, it may be due to an issue with one of the devices.  Restarting all of these can go a long way in fixing any problems. 

You should also check the Hub’s security protocol. Some Hubs don’t support the WEP security protocol, so try a WPA security protocol.  If your router is quite old it may be time for an upgrade.  Older routers often have a WEP security protocol is outdated. 

If there are several access points in your system that broadcast the same SSID, you can try to shut down all access points except one. Restart all devices and try to connect to your WiFi network again. 

Hub Loses WiFi Connection   

Another issue you can encounter with smart weather station troubleshooting is the Hub losing WiFi connection and your weather station is offline. 

Cause: Check the console is close enough to the network router.  Also look at the WiFi router, hub, and range extenders.

Solution: If you have placed the hub a fair distance from the network router, try moving it closer. Check the signal strength on the console by looking at Status.  Move it closer till you get a strong signal strength.  Alternatively, you can connect the Hub to the network router directly.  This will give you a much more stable connection instead of using it using range extenders. 

You can also try to reconnect the Hub to the WiFi network manually or reboot the WiFi router, Hub, and the range extenders. 

If you still have issues with your Hub connecting to the WiFi network, you can clear the WiFi settings and connect again.  To do this, press and hold the reset button until the LED flashes. 

5. Troubleshooting Weather Station Bluetooth Connection 

Cause: If the app cannot detect the Bluetooth connection between the Hub and your phone or tablet, you will receive a “Hub not found” message. 

Solution: If you use an Android phone or tablet, ensure location services are enabled.  

Allow the app to use Bluetooth on your device. 

You can also close the app, unplug your Hub for a short while and then power it back.  Allow the device time to reboot and then continue with the initial setup.  

If this still doesn’t work, restart your tablet or phone.

6. Troubleshooting Other Weather Station Issues

Dashed Wind Direction Data 

You may experience an issue where your weather station console fails to display wind direction data but instead shows a dash. 

Cause: The console may not display wind direction data if the weather station is wireless and there is a failure in signal transmission.  If the weather station is cabled, the issue can arise from a faulty cable. Problems with the anemometer can also cause no data. 

Solution: If the weather station is cabled, you can deal with the issue by replacing the faulty cable.  On the other hand, if the weather station is wireless, check the signal reception.

If these measures don’t work, the issue could be with the anemometer, and you may have to contact the manufacturer. 

Issues With The Wind Chill Reading  

Sometimes the weather station can display inaccurate wind chill readings that are too high or too low. 

Cause: The inaccurate wind chill readings can be due to an anemometer or the temperature sensor issue. 

Solution: Check the anemometer to determine if it has an issue and contacts the manufacturer for a repair or replacement.

Use the ice bath method to check the temperature accuracy. 

Final Thoughts 

It is not unusual to experience issues with your weather station, so follow our weather station troubleshooting tips. Luckily, most of these issues will not require you to hire a technician to rectify them. 

Often, the easiest way to fix any of these is by rebooting or refreshing the device or moving the weather station sensor array or console.  For instance, if the device gives high-temperature readings because it is exposed to direct sunlight, you only need to move it to a shade. 

Let us know if these have helped solve any problems you experienced with your home weather station.  Or, leave a comment below with other solutions you have been able to fix. 

For Davis weather station troubleshooting, read our earlier article.

Windmill Generators: What Are They And How Do They Work?

Windmill Generators: What Are They And How Do They Work?

Have you ever used a fan in your home when the weather becomes hot?  The fan in your house has blades that spin at high speed to produce wind that cools you.  Windmill generators have a similar structure as a fan, though it is more extensive and operates differently. 

Wind power is a versatile source of energy.  But, are wind turbines the same as windmills?  Although people use the two terms interchangeably, there is a considerable difference between them. 

Wind turbines convert kinetic wind energy into electric energy, where windmill generators are primarily useful in converting the kinetic energy from the wind into mechanical energy.  This mechanical energy is then used for various purposes.  These include grinding grain, sawing wood, pumping water, and milling crops.

History Of Windmill Generators

Windmills have been in existence for centuries (more than 3000 years).  

They were mainly used for mechanical purposes such as grinding grain, sawing wood, and pumping water.  

However, since the twentieth century, some windmill generators have also been used for generating electricity.  

The development of modern wind turbines began in the 1970s.  Between 1994 to 2000, the amount of wind power systems in use rose by 25-30% per year.  

As such, wind power qualifies as the fastest-growing source of energy. 

By the year 2000, the global usage of wind power was 38,000 GWh, and the total capacity of wind power installed was 17,500MW.  

The enhanced use of wind power can be attributed to the development of new technology, and the number of wind power plants has increased.  

early windmill generators

Additionally, the cost of production per KWh has gone down, and there is the implementation of new electric systems.

How Do Windmill Generators Work?

One of the most noticeable differences between windmill generators and wind turbines is their size and shape.  A windmill generator is bigger and broader and comes with thicker blades.  On the other hand, a wind turbine is thinner and taller and comes with skinnier blades. 

The difference in size can be attributed to the difference in materials that go into making the two.  For instance, a wind turbine only requires two or three large blades, which should be elevated above the ground.  The blades connect to a rotor which connects to the main shaft.  When the wind blows, the blades rotate and the process helps generate electric energy ready for use. 

A windmill generator uses the same process to generate energy.  However, this happens on a larger scale.

Parts

First, a controller will power the windmill generator.  The blades will start rotating when the built-in anemometer reads the speed of the wind to range between 8 to 16 miles per hour (mph). 

Additionally, the controller will power down the windmill generator if the wind speeds go beyond 55 miles per hour. Wind speeds beyond 55mph can cause damage to the blades and shaft of a windmill generator. 

The windmill generator also features a yaw drive.  Using a wind vane, a yaw drive will orient the windmill generator into the wind, if it changes direction, to maximize its effectiveness. 

Next, the spinning blades of the windmill generator turn the rotor.  The spinning blades together with a hub form a rotor.  When necessary, a pitch system will turn the spinning blades and prevent the rotor from spinning them, especially when the winds are too high or too low to generate power. 

Sometimes you may need to stop the rotor manually, especially if there is an emergency.  As such, the windmill generator comes with a hydraulic, electric, or mechanical brake to help do this. 

The windmill generator also features a gearbox that increases rotational speed.  The gearbox is connected to the rotor with both a low-speed shaft and a high-speed shaft.  This helps to increase the rotational speed of the blades from 30 to 60 rotations per minute to as high as 1,800 rotations per minute.  The gearbox is likely the most expensive part of the windmill generator, and it is also the heaviest. 

Function

Finally, your windmill generator produces mechanical or electrical energy.  The low-speed shaft is used for mechanical energy.  Due to the high rotational speed generated by the high-speed shaft, your windmill generator can produce electric power. 

Engineers are exploring the possibilities of using direct drive generators that can help to generate energy at lower rotational speeds.  This may help get rid of the heavy and expensive gearbox.

Types of Windmill Generators     

Windmill generators come in four different types that include:

  • Post 
  • Tower 
  • Smock 
  • Fan 

Post Windmill

The post windmill is the earliest type of European windmill.  The whole structure pivots on a post to bring the blades into the wind.  Its most outstanding feature is that it’s the windmill’s body, consisting of all the machinery that rotates on the vertical post. 

Smock Windmill 

The smock windmill is a tapered tower traditionally clad in weatherboard, shingles or thatch.  This windmill generator will have 6-12 sides and features a roof that rotates to put the sails into the direction of the wind. 

It is named because of the resemblance to farmers smocks that were traditionally worn.

Tower Mill

A tower windmill refers to a type of vertical windmill generator.  It features a stone or brick tower on which a wooden roof or cap sits.  The body of the windmill doesn’t rotate.  Only a cap rotates to enable the sails to face the direction of the wind. 

Because they have a solid and sturdy base, they are able to be much higher and thus use much larger sails/blades.  This gave them greater reach so they could capture lighter winds and produce more power.

Fan Mill/Waterpump

Fan mills are not windmills, although they often get called that.  Windpump is a much more appropriate term as they are used to extract water deep beneath the earth’s surface.

They feature four to twenty spinning blades situated close together to give high torque with low wind.  The tail turns the sails into the wind and the gearbox runs the pump to extract the water.

types of windmill generators

Various Uses Of Windmill Generators 

Windmill generators are used for various purposes.

  • Windmills come in handy in converting wind energy into electrical or mechanical energy
  • They have been used to extract oil from seeds
  • Processing of various commodities including cocoa, tobacco, spices, paints, dyes, and stock-watering
  • Milling grains
  • Grinding grains and pumping of groundwater

Final Thoughts 

Wind energy has been used for centuries and is becoming increasingly popular due to its minimal environmental impact. Modern windmill generators are used to convert wind energy into mechanical energy and even electrical energy.

They are still used for pumping water, grinding grains and processing certain foods. However, it is the windmill generator’s ability to convert wind energy to electricity that we are interested in.  Harnessing the wind to spin the blades around a rotor allows these machines to produce usable energy from Mother Nature. 

Hope this article has provided you knowledge about windmill generators. Therefore, you would be also interested in wind turbines which you can read in our recent articles; Best Home Wind Turbines Will Save You Money In 2021 and Best Home Wind Turbines 2020.

Ambient WS-5000 Home Weather Station Review

Ambient WS-5000 Home Weather Station Review

Are you a weather enthusiast who wants to find a high-end, sophisticated weather station?  Then search no further than the Ambient WS-5000 home weather station.  It is the first production after Nielsen Kellerman acquired the Ambient Weather brand in 2019. 

The Ambient WS-5000 weather station is a departure from all the other weather stations the brand has produced.  In fact, the up-scale features of this model put it in a class of its own. 

For instance, the weather station now features an ultrasonic wind sensor that doesn’t have any moving parts.  This means that there is no wear and tear, so need to replace the sensor.

Additionally, it comes with a separate rain gauge that features a bigger funnel for more accurate rainfall measurements.  You can also expect more accurate temperature measurements from the up-graded indoor temperature sensor.

Ambient WS-5000 Set-Up Process 

The Ambient WS-5000 package comes with a console, a barometer sensor, and a thermometer/hygrometer sensor.  It also features a separate rain gauge, UV and light sensor, and a sonic anemometer with an integrated thermometer/hygrometer. 

Installing the sensors is an effortless process that doesn’t require you to have advanced technical skills.  This weather station is also compatible with additional sensors, including:

Waterproof Temperature Probe
Lightning Detector
Leak Detector
Soil Moisture Sensor
Ambient Weather WH31P Water Proof Thermometer Probe Sensor
Ambient Weather WH31LA Leak Detector for Models WS-2000, WS-5000 Weather Stations
Ambient Weather WH31L Lightning Detector for Models WS-2000, WS-5000
Ambient Weather WH31SM Soil Moisture Sensor for WS-2000, WS-5000 Weather Stations
Waterproof Temperature Probe
Ambient Weather WH31P Water Proof Thermometer Probe Sensor
Lightning Detector
Ambient Weather WH31LA Leak Detector for Models WS-2000, WS-5000 Weather Stations
Leak Detector
Ambient Weather WH31L Lightning Detector for Models WS-2000, WS-5000
Soil Moisture Sensor
Ambient Weather WH31SM Soil Moisture Sensor for WS-2000, WS-5000 Weather Stations

Last update on 2024-04-15

Neither the base package or the additional sensors come with batteries.  As such, you should ensure you have the batteries on hand.  Most sensors use AA batteries.  It is best to use high-quality lithium batteries as cheap batteries may cause issues with the device’s performance. 

Additionally, the Ambinet WS-5000 weather station comes with easy-to-follow instructions that make it effortless to install.  Most of the weather station comes pre-assembled, which leaves you with not much to put together.  You will need to provide a mounting pole, tripod or other solution. 

It should take about 30-45 minutes to have the device set up and everything running.

Things That Could Slow The Set-Up Process

It’s worth noting that you may encounter some issues that can slow the setup process down.  For instance, the indoor temperature/barometer/humidity sensor and the rain gauge may not connect automatically.  Sometimes it takes a few hours for these sensors to begin to display on the console. 

The next step includes connecting your Ambient WS-5000 with WiFi and an internet connection.  You will need to do this to connect your home weather station with other smart home services such as IFTTT, Amazon Alexa, and Google Assistant.  It also allows you remote access to your data through AmbientWeather.net and other third-party services such as Weather Underground.  Please note that this process may take some time and we have useful tips for connecting to Weather Underground.

User Experience Of The Ambient WS-5000

Besides the quirky setup, Ambient WS-5000 offers an outstanding user experience.  For instance, the model features a sturdy and high-quality build that makes it durable to withstand harsh conditions.  Additionally, it has an attractive finish that makes it appealing and adds some beauty and class to your home. 

Apart from looking great, the Ambient WS-5000 model seems to have dealt with most sensor issues from previous models. The console will receive data from the sensors through walls, which affected some earlier models. 

What’s more, this Ambient weather station has an actual TFT LCD display, unlike some previous models with just a console.  The Ambient WS-5000 LCD display shows all kinds of information in fairly easy-to-read sizes.

It also enables you to separate the screen for making charts of past weather data and recalling. 

The display offers a wide range of viewing angles and you can choose from a light or dark screen.  Most data is easily readable from a fair distance.

As you add more sensors to the weather station, the display may become a little crowded.

Changes To The Sensor Array

You may have experienced issues with previous models of barometric pressure  and rainfall readings.  Some earlier models recorded excess rainfall in heavy downpours and over-responsive barometers.

Ambient Weather WS-5000

Last update on 2024-04-16

The Ambient WS-5000 home weather station has dealt with these issues. It offers more accurate barometric pressure readings from its ultrasonic anemometer.  Plus, the improved rain gauge, featuring a larger funnel, ensures rainfall is measured with greater accuracy. 

The five-second update interval is also a vital improvement compared to previous models.  Earlier models only sent updates every minute or so. 

The ultrasonic anemometer offers greater accuracy of both wind speed and wind direction readings. You may consider adding a heater to prevent the accumulation of snow and ice in winter as this would lead to inaccurate readings. 

Upgradability  

The Ambient WS-5000 home weather station also outperforms previous models in terms of upgradability.  As mentioned earlier, the Ambient WS-5000 package includes a great sensor array however, there are many additional sensors you can purchase.  These enable you to expand your home weather station to include much more weather data. 

Additionally, you can upgrade the console using an optional SD card.  This lets you store your weather data locally, enabling the device to continue operating when there is a power or internet outage. 

Another upgrade you can make on the weather station to enhance its efficiency is the aforementioned heater.  It helps to keep the sonic anemometer and rain gauge free from ice and snow which will cause inaccurate readings. 

Most air quality sensors by Ambient Weather only measure PM2.5, which is the most common size for airborne pollutants.  However, the Ambient WS-5000 allows you to add devices that will measure even PM10 particulate matter levels. 

Connectivity Of The Ambient WS-5000

The Ambient WS-5000 connects to the internet the same way previous models do. You can use the web-based dashboard or the mobile app to connect to the company’s cloud service, AmbientWeather.net. 

WiFi connection enables you to connect your home weather station to other smart home devices such as Google Assistant, Alexa, and IFTTT.  IFTTT can help you to set your sprinklers to stop when it starts raining.  You can also set it to turn the heater or cooler on when the temperature is at pre-set levels.

Amazon Alexa and Google Assistant use your voice to operate the device to ask for a weather report from the Ambient Weather station.

Pros
  • An effortless and straightforward installation process
  • Smart home connectivity (Alexa, Google Assistant, IFTTT)
  • Various additional sensors
  • An attractive display with a wide viewing angle
Cons
  • A cumbersome console-setup process
  • Price is a little on the higher side

Final Thoughts 

Should you buy the Ambient WS-5000 home weather station?  The decision of whether to buy this weather station will depend on your budget and the features you require.  While being one of the more expensive in the range from Ambient Weather it comes with many advanced features compared to its previous counterparts. 

An Ambient Weather WS-5000 has a more intuitive display that can be read from any angle.  It offers opportunities to expand the sensor array and upgrade the device for better performance.  If you are looking for a top-grade home weather station, you definitely need to look at this model.  We absolutely love it!

You can read about other models in the Ambient Weather range in our recent articles.

How Do You Reset AcuRite Thermometer?

How Do You Reset AcuRite Thermometer?

An exact reading is all that you are looking for when using a thermometer.  Your AcuRite outdoor thermometer may, after some time, give less accurate data.  If this is the case, you may need to reset AcuRite thermometer to provide the most up-to-date recordings.

In this article, we’ll show you how to reset an AcuRite outdoor thermometer and address some other common problems.

Calibrate the Temperature and Humidity

As many of the AcuRite thermometers also measure humidity we will look at these two readings together.  Even if you have a dedicated hygrometer or thermometer, the process is the same.

For an indoor thermometer/hygrometer, let the sensors adjust to the new room for around three hours. 

If you are still getting an inaccurate reading on an AcuRite analog thermometer, you must turn the knob on the back of the unit to adjust it.

If you are using a digital model the process is slightly more complicated and we will address it fully later.  

For now, you will need to adjust the slotted fine potentiometer or nut until you have the correct temperature.  Then press the reset button.

AcuRite 00613 Digital Hygrometer & Indoor Thermometer Pre-Calibrated Humidity Gauge, 3' H x 2.5' W x 1.3' D, Black

Test Your AcuRite Outdoor Thermometer For Accuracy

Fill a container with crushed ice and add water to fill it. Give it a stir and let it sit for a few minutes.  Add the thermometer sensor into the container for at least 30 seconds.  It should read 32 degrees F and if so you are good to go.  This test also gives you a great indication of exactly how inaccurate readings are before you reset. 

So, how do I reset my AcuRite outdoor thermometer?  The reset button is located within the battery compartment.  Press and hold the button for a couple of seconds.  After a reset, it will take around 4 hours for readings to appear after you replace the batteries.  You will also need to enter the date and time after a reset.

If your unit is flashing, it means that there is some kind of wireless interference. 

How To Adjust An AcuRite Outdoor Thermometer

For digital display outdoor temperature and humidity calibration, you can do this on the display.  To get to adjustment mode, press and hold the -, SET, and + at the same time for no less than 5 seconds.

How To Reset An AcuRite Iris?

As with all AcuRite weather stations, AcuRite Iris incorporates an outdoor thermometer.  If the sensor is not connecting to the display screen use these reset steps. 

Signs of the sensor not interfacing with the screen could include:

  • No outdoor temperature.
  • The outdoor temperature doesn’t change.
  • No wind speed.
  • Inaccurate wind speed.
  • The outdoor humidity of 1%.

Rainfall not recorded or inaccurate

Inaccurate outdoor temperature

AcuRite Iris (5-in-1) Professional Weather Station with High-Definition Display, Built-In Barometer, and AcuRite Access for Remote Monitoring and Alerts, Compatible with Amazon Alexa, Black (01151M)

Check these things before attempting to hard reset AcuRite thermometer:


  1. Confirm that the A-B-C switch of both the screen and sensor are on the same letter.  These are located in the battery compartments of the sensor and display.  It doesn’t matter which letter you choose as long as they are the same on both.
  2. Try another position for either the sensor array or the display unit.  Under ideal conditions, the models can be up to 330 ft (100 m) of one another.
  3. Keep 3 feet (.9 m) from gadgets that might meddle with remote correspondence (like TVs, microwaves, PCs, and whatnot.
  4. Make sure you use standard alkaline batteries.  AcuRite does not recommend rechargeable or heavy-duty batteries for its products.  Lithium batteries are recommended for the sensor in temperature below – 4ºF/ – 20ºC. 
  5. It will take 5 minutes after replacing the batteries to synchronize the sensor and display unit.

Hard Reset

  • Bring the sensor and screen display together and remove the batteries or power cord.
  • Decide which setting of the A-B-C switch to use and change both to this newsletter.  Press and hold the reset button for about 20 seconds.
  • Add batteries to the outdoor sensor.
  • Re-connect the power cord or replace the batteries in the display unit.  The reset button must be immediately held for 20 seconds if there is one.
  • Keep the units together for 5 minutes or until you see a strong sensor signal.

AcuRite Iris Outdoor Thermometer Inaccurate Temperature Readings 

These apply if your AcuRite Iris with outdoor thermometer or My AcuRite® account is showing wrong or inaccurate outdoor temperature or humidity data. 

Use these steps to correct the following error codes which are often seen when there is corrosion of the wires.

  • -40 degrees
  • 158 degrees
  • 1% humidity
  • 99% humidity

Before dismantling the sensor unit, confirm the following:

  • Are the sensor array and display free from vents or other heat sources?
  • Does the display unit have full signal strength – you should see 4 bars.
  • Make sure both the display and sensor array are clear from any source of moisture.
  • Is the sensor mounted at least 5 ft from the ground?

Once you have confirmed the above and if the error codes persist, you will need to delve a bit deeper into the sensor array.

Remove the 4 screws at the base of the unit and clear any debris and dust.  Check and gently clean all components.  Ensure there is no corrosion or the red and black wires that connect to the temperature/humidity board.  If corrosion is found, this is most likely the reason for the error codes and will need to be corrected. 

AcuRite Outdoor Thermometer Still Not Working?

If you have gone through the above steps and still have issues with an AcuRite outdoor thermometer, contact AcuRite’s U.S.-based support staff.  You can submit a request or chat with their live experts. 

If you have an open ticket with a help specialist, make sure to check your email for a response.  And, check your junk folder.

Conclusion

There are many factors that can affect the accuracy of your AcuRite outdoor thermometer.  From the sensor being in the wrong place, batteries needing replacing, or corrosion occurring in an outdoor sensor array.

This article gives some simple fixes and tests you can do yourself to ensure your AcuRite outdoor thermometer works properly for many years.  Leave a comment below if you found this article helpful.

Read more about AcuRite products in our recent articles.

Weather Underground: How To Connect Your Weather Station?

Weather Underground: How To Connect Your Weather Station?

Hi weather enthusiasts!  Are you having fun using your home weather station?  To optimize functionality, you should look to connect your weather station to Weather Underground.  

This gives you access to much more weather data, and, it allows you to share your information with others.  So, how long will it take for a home weather station to show on Weather Underground?

What Is Weather Underground?

Weather Underground is a dedicated weather service.  It allows you to access real-time information related to current weather conditions all over the globe.  Information includes hyper-local weather forecasts, weekly weather predictions for your area or any specified region. 

In addition, relevant weather information is sourced from all corners of the globe.  In fact, over 250,000 weather stations are connected to Weather Underground.  You can also send local weather updates through your weather station to the Weather Underground database. 

The ultimate objective of Weather Underground is to ensure highly accurate weather reports for individuals irrespective of their location. 

Why Use It for Your Weather Station?

Weather Underground collates multiple sets of data and offers highly relevant local weather data.   It can offer accurate and up-to-date local weather information and gives weather forecasts for different regions and locations as well. 

The brand features an expert team of passionate developers, plus a generous community of weather enthusiasts.  All these people continuously share real-time weather-specific data from business and home-based weather stations. 

In addition, the massive Weather Underground database gives extensive and hyper-local weather forecasts.  Find out exactly what is happening in your area or any region you are going to.  Never let the weather catch you unaware again!

How Does It Work?

Any weather junkie knows that data volume is not solely responsible for determining the quality of weather information.  Weather Underground leverages a proprietary weather forecasting model. In fact, it is supported by a team of expert meteorologists to deliver access to exceptional weather forecasts. 

The team is also responsible for sharing valuable insights into the exact science behind the nature of weather and various weather reports.  Weather Underground data reveals information about climate change, weather patterns, and their existing relationships.  

Furthermore, the platform is committed to providing a fun-filled and user-friendly experience.  It enables you access to abundant weather data, in fact, any that you need – instantly.

Experiencing Weather Underground

Get access to WunderMap – use the interactive platform on your tablet or PC, or, you can download the app.  The interactive map features amazing information with a single touch, including:

  • Tropical and severe storm information
  • Weather data obtained from an individual, private weather stations for providing information on local climate, temperature, precipitation, humidity, and wind data
  • Atmospheric conditions –including satellite images, past or future radar reports, wind stream, and weather fronts
  • Air quality with readings on the scale between PM 2.5 & PM 10
  • Wildfire activities including smoke readings and fire perimeters 

Using Weather Underground 

When you have a weather station with WiFi capability, you can add to the existing data network of Wunderground.  Larger data input from any area leads to more accurate, hyper-local weather information.  It tends to benefit not only you but the entire community.  

For instance, imagine the benefits of highly accurate, local weather data during cyclones, wildfires, floods, and other emergencies. 

Once you link your weather station to the network of Weather Underground, you connect with like-minded enthusiasts.  In fact, you can find other people in your local area, or anywhere in the world.  Sharing weather data will improve weather forecasting across the globe.  How great will that be? 

So, are you a weather enthusiast?  Do you want to add relevant weather information to Wunderground from your area?  Let us show you how easy the process is.

Updating Weather Information On Weather Underground Through Your Weather Station

To ensure your weather station data shows on Weather Underground, follow these easy steps:

  • weather underground report status indicatorVisit the website and ensure that your weather station is reporting in real-time.  If the status indicator appears green, your weather station is reporting data to the network of Weather Underground.
  • When the weather station is linked to the network, there are a few reasons why it is not updating in the map or the app.
  1. If you are new to WunderGround or in offline status, it will take around 1-2 days to get added to the network.
  2. It detects a Quality Control issue with your weather-specific data.  It could occur if your weather station goes offline for any period of time.  Your data will be suspended if parameters such as temperature are very different from other weather stations in your area. 
  3. There may be issues with the website but their technical support team is very efficient and most glitches are fixed very quickly.  Be patient and report any issue on the official website. 

Weather Station Readings Not Being Sent to Weather Underground

This might occur if your Wunderground Station key, password, or ID is entered incorrectly.  If the readings are available in your weather station, try resolving this issue by looking into the following possible solutions.

  • Verify that your weather station has been receiving weather readings for around 2 hours.  You can go through the sensor readings as displayed on the station’s dashboard. 
  • Confirm your profile on Weather Underground for your home weather station has the right station ID and password. 
  • Make sure that you have selected the right sensor. 

Conclusion 

Connecting your home weather station to Weather Underground has many benefits.  Not only just for yourself, but for every weather enthusiast in the world.  

Having a large number of stations connected over any period of time leads to more accurate weather data.  Over time, this information about a regions weather allows formula to better predict the coming weather.  

As this vast network grows, we are able to get more accurate hyper-local weather data and forecasts.  Also, it allows you to look at current and historical weather information for any area on the globe.

If you aren’t connected to Weather Underground, you certainly should look to do so.  You can easily upgrade an older home weather station to ensure WiFi connectivity and start streaming your weather data to the world.